Showing posts with label geek. Show all posts

Thursday, August 20, 2015

Video - 3D Printing In Glass Is Now A Reality!!!

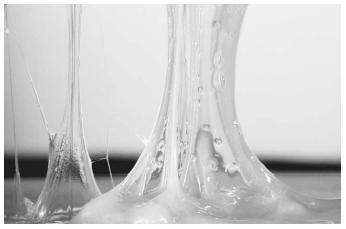
The possibility of printing in glass is now a reality, mesmerizing, and beautiful.  This very much reminds me of using the E3D's hot end, the Volcano creating large structure layers which adds to the aesthetics of the item as well as the overall structure.  


Hope you enjoyed this post and thanks for stopping by!

Thursday, February 5, 2015

3D Printing : Cold Vapor Smoothing

you can click on all the pics for larger views!
So I've been working on this Nexus 7 w/Battery Charger Holder/Stand (Prototype) which originated with this model on thingiverse http://www.thingiverse.com/thing:355918 .

Its an ok design, but the cable goes out the side instead of straight back, the stand itself slides around unless affixed to a surface even with the battery in the mount providing a bit a weight, and the magnet is so strong between the charger and the nexus7 that more than often the charger puck gets pulled out of the stand.  Not to mention that as presented its almost impossible to print on some printers.

So I took the design and tweaked it, I separated it into two sections so any printer can print it, I also placed in a small divot in the back of the charger area for some velcro or adhesive strips, as well as divots on the bottom to hold the stand in place on a surface, and included a "spinner" device so you can orient the viewing angle. 

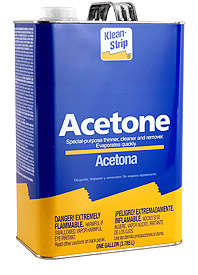
However this post is really about the "finish" of the stand.  Being that I'm using ABS plastic which "melts/dissolves" in acetone you can use a process called vapor polishing to give your products a injected molded look. (You can't use acetone with PLA or other similar plastics, each plastic usually has its own chemical that similar effects can be achieved however some of those are really nasty compounds and I'd avoid using them in a process like this.)

There are typically two methods to do this and both are similar, one method uses added heat to hurry the vapor process and "melting" of the plastic along with a breif stint in the freeze of the object you want to smooth before you put it in to the hot vapor path.

The other method is using the same process minus the added heat and stint in the freezer.  This is the cold process

Tuesday, January 6, 2015

3D Printing : IKEA Hack - Lustifik Shelf Extension - Filament Holder

Filament! I've got plenty, but I'm always looking for more, especially if there are new blends, new materials, etc! I really like testing out new filament and thinking on the possibilities that these materials could end up becoming or how to use them.  Its one of the reasons I got the replicator 2x "experimental", which I regret, since that is so far from the truth.  But that's for another show ;)  Thankfully I have a delta printer as well! :D

With so much filament, 64 or so spools at last count, I was just stacking it on my shelves as wide as the shelf, two spools deep and two  or three spools high.  But this was a bit unwieldy and the spools had a tendency to slide, especially if I stacked them three high.

initial prototype no channel, testing
out the strength with filament
support added in (the white) 
I started using peg board to hang my spools of filament from and had everything arranged via ROYGBIV designation, but I noticed that even a few of my ABS spools were taking on moisture, so I'm was sure my PLA that was sitting out in the open too would be troublesome in the future.  You can read about a solution I constructed to help "dry" out spools.  While its a good solution  when needed, I didn't want to have to do this every time so I needed to make sure they remained bagged with desiccant. When I rearranged the peg board I could only fit 2 spools on top of two peg board pegs.  I needed a better solution.


I had an extra IKEA Lustifik shelf and when put side by side i could fit about 6-8 spools per shelf (depending on the thickness of the spools)  which was a much better solution.  You can also flip another Lustifik shelf on top of the initial shelf and attach via bolts however you're left with a "middle shelf" that's about an one inch high. Here is a pic of the starting of the "shelf tower".  As you might guess the"plugs" that attach two units will create a small shelf, which I plan to use for sample filaments I receive from manufacturers or unspooled filament, like laywood, or laybrick.

you can click on any of these pics to make them full size!

I designed the following files to fit between the two units and free up that space.


The rods extend between the two units when you flip the shelving units, the plugs are for the upside unit, where you remove the no scuff feet and insert those plugs so that you can join another unit together.


As you can see I print out 8 "halves" and then use the adhesive below, but you can straight acetone to "weld" the two halves together as well.  The larger holes are there to save on material, the smaller holes are there, if you want, to use as an additional method to strengthen the object by using 1.75mm filament which you put adhesive on and then slide into the holes which then are welded/bonded to the plug (as can be seen in the pic on the right) or strut.  After gluing I decided the extra filament welds weren't needed, those struts and plugs are plenty strong!  

The final feature is a channel going down the center to allow you to insert a 2in bolt/machine screw along with a nylon hex nut that fits in the 2nd hole from each side that goes through the tubing on the shelf unit.  With a bit of screwing the hexnut should retract and come to rest between the two circular holes with in the strut and provide extra added strength.  Oh and I got my adhesive at Tap Plastics here in San Jose, CA.  


As you can see in the last photo the print on the delta, this is with ABS, even though it has a heated bed with no "enclosure" the plastic really wants to "warp" and it pulling up the blue tape!

Hope you enjoyed this post and thanks for stopping by!

Friday, November 21, 2014

3D Printing Video : Printing With Ninjaflex and Rubber TPE

So with the holidays arriving soon, I again wanted to make some gifts this year for various relatives and friends who I'll be spending the holidays with.  While searching thingiverse i found this pretty cool Bear model in the Voronoi style.

So after printing it in a transparently blue PLA filament from polymakr, I decided to try out some of the flexible filaments I've had on hand for awhile but have done nothing more than print a sample chip out .


(if you're a filament manufacturer and want me to test a sample of a filament you're developing feel free to contact me)
I tried printing out with this type of filament before, and failed, mostly because either the extruder that I was using caused the filament to buckle and just wrap itself around the stepper motor, or after extruding a bit for the first few layers would just stop extruding as the gripper gear would just lose its grip and not push the filament along ending up in "air prints".  

Being that I have about 15 rolls of various flex materials I figured I better start using these filament and decided to try various methods of getting these filament to print correctly. (read and see more after the jump!)

Monday, August 11, 2014

3D Printing : The NINTASTIC - A Fantastic Case For Your Raspberry Pi!

click to embiggen
This was a commissioned piece from a friend/coworker for his roommate's birthday present. They're using their Raspberry Pi as a nintendo NES emulator, so naturally the Nintastic was required as a case for the Pi.

I used the "longer model" than the "original model" since it was mentioned that if a sd card was installed into the pi the door wouldn't close on the original.
click to embiggen
I decided to print these out at 100microns (which looking back should have gone with 200µm, maybe even 300µm to cut the time down, as the bottom took about 15 hrs, and the top took around 9 hrs, at 30mm extruder head speeds. 
click to embiggen
I again used 3d2print "Grey" Filament for all the pieces involved.  Now you might ask wait a second I see a few different colors on that finished model.  Well, the black portions are model paint, as well as the red in the lettering and button highlights.   The bottom, however was entirely colored using four basic black sharpies and a 3d printed addon here to hold four of the sharpies. The over all process is explained more in detail here.  Essentially I "tinted" the filament before it went into the hot end and the outcome was a considerably darker color of grey.  It certainly very interesting to see how much of a color shift you can get. 
click to embiggen
Hope you enjoyed this post and thanks for stopping by!

Monday, August 4, 2014

3D Printing : These Are Maybe The Droids You're Looking For! (Stormtrooper Helmets)

Click To Embiggen

So as a birthday gift for someone who is into sci-fi, and loves Star Wars, I printed out a couple of the Stormtrooper helmets from thingiverse.  These are resculpts to better print on 3d printers.  http://www.thingiverse.com/thing:362947 

The helmets turned out pretty well at 200 microns layer height.  I printed them out using 3d2print's White filament.  I then decided to try and see what sharpies would do on the raw prints, and sadly through capillary action the ink was sucked out of the areas that I initially colored it, so I decided to "finish them off".  I then used a some automotive auto primer and filler and that worked pretty well to fill in the lines and needed a little sanding.

Click To Embiggen
Once sanded I put a few too many coats of gloss white on them, and either the weather or temp, or just too many coats ended up with not the best finish, and time being what it was as the birthday was fast approaching, I attempted to fix it the best I could and at the very last minute slapped on some model paint for details.  Certainly not my best paint job, and kind of embarrassing considering what level I used to paint to. (I used to paint minis all the time for my various RPG's and Battletech.)  But its the thought that counts right! :)  If I had more time and used my airbrush for some details I think i could have done a way better job!  Well next time!  If you have any questions feel free to contact me!

Hope you enjoyed this post and thanks for stopping by!

Wednesday, April 16, 2014

3D Printing : Filaments Filaments Filaments!

So today I wanted to share the latest round of filaments I've purchased over the last couple of months that I have printed a "sample chip" for.  This quick and dirty "test" is one I use to see how difficult it is to print with a filament, or even if its possible, and then gives me something to show off to anyone who wants something printed in a specific color or material.  Here is the sample chip I use which is taken directly from thingiverse:


So here are a few of the filaments that I've gathered in pic form below(you can click on all of the pics for the larger size):

showing off the tglase, qubd filaments, and transparent colors
frommakergeeks.


Heat sensitive filament

goes from dark grey to a clear

Ultra Glow Filament

trying to show the ultra glow but phone camera is crap.


So as you can see I've been getting a lot of new samples lately.  Some of my initial observations are that the EcoFlexPLA and the 3d2 print (as seen in the video above) seem to be about the same in flexibility, that is to say they are more rigid than the NinjaFlex.  One flexible filament I haven't had a chance to test, as I have yet to order any, is the filaflex filaments from RECREUS.com.

One thing to notice in the last pic are the 5 sample chips with some writing on them in sharpie, those are all the same filament!  The 3d2prints clear rubber made those chips using varying temps and z resolutions.  Saddly I couldn't remember or reproduce the very clear one, top row middle, but that chip actually is about only 3 layers deep and didn't finish, so that could be the reason why its so clear.  The higher the temp it seems the more clear, but that could be also because I increased from 100 to 200 microns.  I should try out a 300 micron layer as I would expect even more clarity.

Now Ninjaflex is completely flexible, more akin to a silicone in my opinion, also comes basic colors as can be seen, but they just added new colors Sun(yellow), flamingo(hot pink), lava(orange), and water(a clearish rubber).

Also in the last pic you can  the very last two semi clear/white chips, those are UV sensitive materials which is why they have a redish/pinkish hue going across their middles.  I took my blue laser light and zapped em for a few seconds.  One is from maker geeks which supply for around $20 .25kg of the material where as if you go to zen toolworks on amazon, you get 1kg for 49.99. which I think is the better deal if you want a full spool.  

The last chip I want to talk about is the black one on the bottom row sitting all by itself.  Its also from zentoolworks and its black conductive filament!  Its rated at 10,000 ohms per cm and I haven't seen alot on this filament, one youtuber came up with a niffty wiper using copper tape and a design he made that changes the resistance and thus the readout on a 1 digit readout.


One thing I do want to say about the conductive filament is that holy crap is that stuff is a pain to clear our of your nozzle!  I imagine its because of the material they use as the chip feels like a graphite like material and seems a bit more brittle than normal ABS, but I ran some clear then red filament scraps about 5 m worth through the nozzle and there were still bits and pieces coming out, as can been seen in the first uv filament chip (which I printed right after I "thought" the nozzle was clean).  My suggestion is to use a seperate head if you plan on using the conductive material alot!


Hope you enjoyed this post and thanks for stopping by!

Monday, April 14, 2014

3D Printing : Colorizing your filaments!

I came across a blog from Rich @ richrap.com, who by using nylon and some rit fabric dyes was able to make some very useful vases and object with his 3d printer.  I also came across this object on thingiverse which allows you to color white or clear (or really any filament) using sharpie markers:


So I ended up picking up some sharpie markers from amazon and decide to have a go a colorizing my filaments.  Here is the video below: (bonus stay to the end and see the polymakr filaments as well as a test of the uv sensitive filaments with a blue laser! :D) 


I saw this little project on thingiverse today and figured I should include the object, its for testing out nylon and rit dyes vs how many hours you leave the samples in the dye.  Very useful to have samples for what can be done and what effects you're capable of when planning new projects or objects!


Hope you enjoyed this post and thanks for stopping by!

Thursday, March 6, 2014

3D Printing : Drying Filament For $15!

So recently I've been printing with some ABS that I had sitting around out in the open.  I was getting very small "bubbles" or pock marks in the sides of walls and other flat surfaces.  These inconsistencies I chalked up to being that the filament had absorbed moisture as the rains recently likely to have contributed to this effect.  I hadn't realized that like PLA, ABS is also prone to moisture absorption too!  So I decided to do something about it. I had seen this project on thingiverse:

http://www.thingiverse.com/thing:35710

*disclaimer: I'm not responsible for your screw ups, and if you burn your house down, damage your or others property, or hurt yourself in anyway, the fault is upon you.*

So to make this "device", its pretty inexpensive, and I was game to try drying out the filament so I can get it back to printing smooth as silk again.

While I mentioned that I had found the project on thingiverse, I just gave a cursory look to the instructions and plans, after all what more is there than a lightbulb, 5 gal bucket, desiccant, and some hydro saturated filament?! You might want to follow the instructions a bit more to the letter or at least learn from my mistake.  

So what I did was hit up my big box home improvement store, grabbed a 5 gal bucket, a clamp light with a small reflector, some 4pk DampRid refills,  and a two pk 100w light bulb.  Total cost around $15!

First I cut a quick hole into the top of the lid of the 5 gal bucket, just large enough to fit the light fixture through, and then screwed back on the aluminum reflector, its a snug enough fit that I didn't need to glue or ad any other items to it.  Next I placed in the bottom the DampRid, two packets and on top of those I placed two spools of filament.  ONLY DO 1 SPOOL AT A TIME!  

As you can see the second spool was too close to the bulb that it actually melted the spool itself and some of the filament! Don't worry i should be able to save the spool and just cut out the fused bit. Instead of using a100w bulb, which the clamp light is rated for only 75w anyways, whoops!, I'd swap out the 100w and use a 25w or 35w bulb. 


I only operated the device while I was awake and and checking on it on a regular basis when I was using the 100w bulb.  

I would assume with a 25w bulb you could leave it on for extended periods without issue.   

I'm going to swap out the light bulb for a lower power one, but still will only do one spool at a time, then keep those newly "dried" spools in zip locks with more DampRid/Desiccant so I don't have to go through this procedure again hopefully. 

The pics looks wildly different because I increased the bracketing on my cell phone camera, so don't worry the 2nd pic isn't glowing WHITE HOT!

Overall the aluminum reflector gets too hot to touch, but the plastic around it and in the bucket remain warm to the touch.  The room I did this in smelled a bit of plastic, so ventilation would be recommended, and as mentioned before I would recommend using a lower wattage bulb and a longer period of time drying one spool at a time.  This should work with both PLA and ABS, thought especially with PLA I would use a lower watt bulb than 100w as you would end up i think melting the PLA into an unusable block of filament.

When I finish drying out a spool with this method I'll attempt a print and attach the results here:

(for future results) 

Hope you enjoyed this post and thanks for stopping by!

Thursday, February 20, 2014

New Filaments! Candy, Transparent, Translucent PLA! and MTG Card Boxes!

Click To Embiggen!
So awhile back I was searching for some transparent colored PLA and found the following at quintessentialuniversalbuildingdevice.com  It was a new line of PLA with transparent/translucent aspects and with some fun names to boot!  Here is a listing of their names and a pic of the filament with a tea-light:

Click To Embiggen!

I've been printing with most of these filaments, and I'm really liking the effects and just how really good these filaments look on a finished print.  Especially my latest projects which are Magic the Gathering Deck Boxes!  I've printed out one in each of the colors including the Frost Transparent and they all look great.  The "smoke" is more "black" than transparent/translucent.  But the "Candy" filaments look awesome with a light either inside or behind them!  Take a look!


The "transparency" can be greatly affected by your infill.  I printed one box in the Frost Transparent at 100% infill vs the 15% infill for all of the boxes above and the effect is pretty dramatic in that since there are no "air pockets" for light to refract the light the box is pretty translucent to where you can almost read the card.  I'll certainly be buying these filaments again when I run out of the first batch!


Hope you enjoyed this post and thanks for stopping by!

Thursday, February 13, 2014

What Adhesive Do You Use When 3D Printing On Glass?

I recently upgrade my 3d printer, a replicator 2x, with a heated print bed made of aluminum and which used as the print bed borosilicate glass plates.  Upon ordering the upgrade I also picked up an extra glass plate in hopes of using one for printing while the other which just finished was cooling down and allowing for easy removal of the project, and so I'd not have to level the bed over and over.

Well one reason to use a glass print bed is the you get an ultra smooth finish on the "bottom/1st" layer.  However with the nature of some plastics such as ABS the thermal properties can cause "warpage" even if you have a heated build chamber and heated print bed.  So typically you use an adhesive to better adhere your 3d prints to your print bed in hope to stop any curly before it has a chance to start!

So lets talk about adhesives! I initially was using just blue painters tape, and while it works well any nick or imperfection would sometimes catch upon the printhead, especially if printing at 70 or 100 microns and thus would cause a warp point.  Also you wouldn't get that ultra smooth finish with blue painters tape, you'd get the masking tape texture which actually is very nice if you're shooting for that kind of a finish. 

Next I went for hairspray, Aqua Net hairspray to be exact.  While it did seem to work as well as the painter tape for the basics of ABS and PLA, I found it to be "messy" in that you had to spray apply it, which would result in "over spray" and you'd end up with sticky surroundings eventually, not to mention the urge to cough and cough because of the fumes from the aerosol.  Also it would seem to "bead" up on the print bed and thus needed to be smeared via paper towl to get the really good coverage.  

I heard of people using ABS Juice, which was a mixture of ABS, possibly scrap portions of previous failed prints, or just clip'd off a portion of filament from the spool you were using and Acetone.  I've never attempted this for two reasons, for one you would need ABS Juice for every color that  you're printing in, and two what does one do when you print with PLA as its almost impervious to PLA Solvents.

Lastly I heard of using Glue Stick.  In fact ultimaker II's now seemed to encourage the use of gluestick, as they included it in the ultimaker's II's box.  This is the current adhesive I'm using.  It works wonders for both ABS, PLA, and any other filament that I've tried so far, t-glass, wood, etc.  (haven't tried Nylon yet).  I just put a nice little smear upon the printbed as its heating and then when a print is done I freshen up the smear with a bit more of the glue. 

However be it know you might run afoul of the dangers or printing on glass and using adhesives.  This pic illustrates an issue I had with some glass plates and thermal pressure/bonding of the glue stick adhesive..
Printed out these lovely little boxes and their covers
while letting them cool I heard a few "pops" as they cooled down
and were released from the print bed.
This is what happened when inspecting one of the lids
I saw that it had "pop'd" off with a chuck/chip of glass!
Strong bond indeed!
This actually happened on another print as well but with much
more catastrophic results.  The "pop" was much louder on this one
as the print pop'd off and cracked the entire build plate!
Regardless of the failures of the glass plates the glue stick is my choice of adhesive as its easy to use, works really well in holding down corners so no warpage and with the addition that its water soluble it readily cleans up wiht just a bit of hot water when your build plate becomes encrusted with too much glue.  I think i'm going to just switch to regular glass from the hardware store as its easily obtained and cheaper than the custom build plates and the breakage is just something that I'll deal with when it occurs.  

Hope you enjoyed this post and thanks for stopping by!

linkwithin

Related Posts Plugin for WordPress, Blogger...